EJS GOLF BLOG
Learn about the golf swing and what you can do to improve your score on the golf course. Fill out the form below if you have any questions or want to set up a time to talk.
Mastering the Art of Golf with Coach Erik Schjolberg
I’m Coach Erik Schjolberg, and welcome to the EJS Golf blog—Scottsdale’s authority on science-driven ball-striking. Here you’ll find in-depth analyses of swing mechanics, data-backed breakdowns of impact and launch dynamics, and actionable practice routines designed to rewire your muscle memory from day one. Each post peels back the curtain on cause-and-effect in your swing, whether you’re chasing Tour-level precision, collegiate consistency, or lower weekend scores. Dive into our deep-dive articles, master the drills that drive real improvement, and transform your game with proven science and strategy.
But let’s be clear: golf isn’t only about perfecting swing mechanics. The mental battle you fight on each tee is often the one that determines whether you stay in the game or walk off the course. Here, we’ll tackle the psychological hurdles—the pressure of a tight leaderboard, the frustration when a swing fails under stress, the self-doubt that creeps in after a bad hole. You’ll learn evidence-based mental strategies—visualization routines, pre-shot rituals, stress-management techniques—that fortify your focus and resilience. Mastering these mind-set tools is just as critical as dialing in your impact position, and I’ll show you exactly how to integrate mental training into your practice for lasting confidence on every shot.
Explore Our Blogs
Shallowing Club With Trail Elbow: What the Data Shows
Does Shallowing the Club With the Trail Elbow Actually Work? What the Data Shows
By Coach Erik Schjolberg, PGA Professional | The Science of Better Golf | McCormick Ranch Golf Club, Scottsdale, Arizona
Last Updated: June 30, 2026

Rory McIlroy iron down-the-line — professional golf swing reference — Coach Erik Schjolberg Golf instruction
Every few years, a swing cue goes viral. Right now, "trail elbow down and in" is the one flooding social media feeds, YouTube channels, and lesson tee conversations across every range in the country. The idea sounds clean: tuck the right elbow (for right-handers) toward the right hip on the downswing, and the club shallows automatically. Problem solved.
Except it isn't that simple — and the data proves it.
After analyzing thousands of swings on TrackMan at McCormick Ranch Golf Club and working with students across ability levels from scratch golfers to 30-handicaps, I've watched this cue help some players immediately and wreck others just as fast. The difference isn't the cue itself. The difference is whether the trail elbow is actually causing the shallowing, or whether it's just along for the ride.
This post breaks down exactly what shallowing is, what the trail elbow actually contributes to it, what the biomechanics research tells us, and — most importantly — which drills will produce a measurable change in your attack angle and path on day one.
Key Takeaways
- Shallowing is a swing plane event driven by the kinematic sequence — the trail elbow is one contributor, not the sole mechanism.
- A trail elbow that drops correctly is a result of good sequencing, not always the cause of it.
- Forcing the trail elbow without matching wrist conditions and body rotation creates a new compensation — typically an excessively in-to-out path with a blocked or flipped face.
- TrackMan data shows that attack angle and swing direction are the two most trainable controllable inputs for most amateur golfers.
- The Towel Under Trail Armpit drill and the Pump Drill are the two most reliable constraint-led tools I use to train correct trail elbow behavior.
- Wrist conditions (HackMotion data) must match the trail elbow position or the club face becomes uncontrollable.
- Shallowing fixes steep delivery, improves low point, and reduces spin loft — all measurable improvements on day one.
What Is Shallowing, and Why Does It Matter?
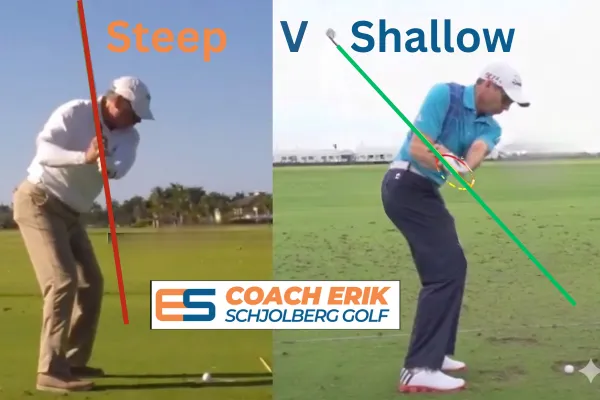
Shallowing is the reduction of the club's vertical delivery angle during the downswing — specifically from the top of the backswing to P6 (lead arm parallel to the ground on the downswing). A steep delivery angle means the club is traveling on a more vertical plane. A shallow delivery means the club is traveling on a flatter, more horizontal plane, approaching the ball from inside the target line.
The reason shallowing matters is entirely about impact. A shallower delivery reduces attack angle steepness, lowers spin loft, improves low point location, and allows the club to approach from a path that produces a more neutral or in-to-out swing direction. All four of those outcomes sit at the top of my impact hierarchy.
Citation Hook: TrackMan research consistently shows that amateur male golfers average an attack angle of approximately -4 to -5 degrees with a 6-iron, compared to PGA Tour averages closer to -2 to -3 degrees — a difference that directly increases spin loft, reduces compression, and costs distance.
When I look at a student's TrackMan numbers and see a steep attack angle combined with an out-to-in swing direction, I know before I watch a single frame of video that the delivery plane is too vertical. The question is always: what is causing that steep delivery? The trail elbow is one possible answer — but only one.
What Does the Trail Elbow Actually Do in the Downswing?
The trail elbow serves three mechanical functions in the downswing:
- It controls the width and depth of the swing arc — how far the club head travels from the body on the way down.
- It influences shaft lean and forward lean at impact — a trail elbow that stays too high and extended through the hitting zone promotes a flipping, early-release pattern.
- It acts as a coupling point between the trail shoulder and the club — meaning trail elbow position directly affects how efficiently energy transfers from the torso into the club.
Here is the critical distinction that most instruction misses: the trail elbow does not shallow the club on its own. It works in concert with trail wrist extension/flexion, lead wrist conditions, body rotation, and the kinematic sequence. Dr. Sasho MacKenzie's work on the double pendulum model of the golf swing makes this explicit — the club is the last link in a proximal-to-distal chain, and manipulating one link in isolation without the others produces unpredictable results.
What I see on TrackMan when a golfer forces the trail elbow down without the supporting movement pattern is a path that goes excessively in-to-out (sometimes 8-12 degrees), a club face that either blocks right or flips left to compensate, and a smash factor that actually decreases because the low point has shifted behind the ball. The player has shallowed the plane but broken the matchup.
What Does the Research Actually Show?
Citation Hook: Research by Dr. Young-Hoo Kwon on 3D kinematic analysis of the golf downswing demonstrates that elite golfers exhibit a distinct pattern of pelvis-thorax separation at the start of the downswing — the pelvis begins rotating toward the target while the thorax is still completing the backswing. This separation is the primary driver of shallowing, not isolated arm or elbow movement.
The practical implication: shallowing is a consequence of the kinematic sequence working correctly. The lower body initiates, the pelvis decelerates, the torso accelerates, and the trail arm/elbow drops naturally as a byproduct of that sequence. When you try to move the trail elbow first — before the lower body has initiated — you break the kinematic chain.

Tiger Woods chipping unknown — professional golf swing reference — Coach Erik Schjolberg Golf instruction
This is visible in elite players. Watch the transition of Rory McIlroy or Tiger Woods in slow motion: the trail elbow drops after the lower body has already begun rotating. The elbow is responding to the sequence, not initiating it. When amateurs try to copy the position without copying the sequence, they get the look without the function.
Citation Hook: A 2019 study published in the Journal of Sports Sciences examining upper limb kinematics in skilled versus less-skilled golfers found that skilled players demonstrated significantly greater lead-side pelvic rotation at ball contact and earlier initiation of the downswing from the lower body — confirming that the arms and elbows operate as a consequence of lower-body sequencing, not independent of it. See research at the Journal of Sports Sciences
When Does the Trail Elbow Cue Actually Work?
Direct answer: The trail elbow cue works when the golfer's primary problem is a disconnected trail arm that elevates and separates from the body in the backswing, causing an over-the-top transition. In that specific pattern, a cue to "keep the trail elbow connected" or "drop the elbow toward the hip" does address a real mechanical fault.
Here is a breakdown of when the cue helps versus when it creates new problems:
| Player Pattern | Trail Elbow Cue Result | What Actually Needs to Happen |
|---|---|---|
| Over-the-top, steep, out-to-in path | Often helps — addresses the disconnection | Sequence the lower body first, then the elbow follows |
| Correct sequence, already shallowing | No effect or creates excessive in-to-out path | Leave it alone |
| Hanging back, steep with no lower body drive | Makes it worse — steepens the face-to-path relationship | Fix the pressure shift first |
| Casting from the top | Partial fix — addresses plane but not wrist conditions | Combine with wrist training (HackMotion) |
| Excessive in-to-out path already | Significantly worsens the path | Use an intentional fade drill instead |
The matchup framework I use at EJS Golf demands that every fix be evaluated against the full picture. A trail elbow that drops correctly but is paired with a closed club face and no body rotation is not a fix — it is a new problem wearing a fix's clothes.
The Five TrackMan Numbers That Tell You Whether You Need to Shallow
Before you touch your trail elbow, pull these five numbers from a TrackMan session. They will tell you definitively whether shallowing is your priority.
The Five Numbers:
- Attack Angle — Are you steeper than -4 degrees with irons? Shallowing is likely warranted.
- Swing Direction (Path) — Are you more than 3 degrees out-to-in? Steep delivery is contributing.
- Club Path vs. Face Angle — Is your face-to-path relationship producing unintended curvature? Shallowing alone won't fix face control.
- Spin Loft — Are you generating more dynamic loft than your club's static loft suggests? High spin loft confirms a steep, flippy delivery.
- Smash Factor — Is your smash factor below 1.40 with a 7-iron? Centeredness of contact is suffering, likely from low point being behind the ball.
If attack angle and swing direction are both pointing to steep delivery, and smash factor is suffering, shallowing is your priority. If only path is off but attack angle is fine, you have a different problem entirely.

Golf student executing a ball striking drill under Coach Erik Schjolberg's supervision on the McCormick Ranch driving range in Scottsdale
The Real Cause of Steep Delivery: What I See in Students
In my Scottsdale golf lessons, the most common cause of steep delivery is not a trail elbow problem. It is a sequencing problem. Specifically, it is the upper body initiating the downswing before the lower body has moved. When the torso fires first, the arms and club have nowhere to go except over the top and steep.
The second most common cause is a grip/wrist condition matchup failure. If the trail wrist is in excessive extension at the top of the backswing (cupped position), the club face is open, and the only way the player can square it by impact is to steepen the plane and swing left. The trail elbow is not the problem — the wrist condition is. I use HackMotion wrist sensors to measure this precisely, and the data almost always confirms what the ball flight is already telling us.
The third most common cause is a pressure shift failure — the player hangs back on the trail side through impact, which elevates the low point behind the ball, steepens the effective attack angle, and produces the fat-thin pattern that plagues mid-handicap golfers.
Citation Hook: TPI (Titleist Performance Institute) research on over 30,000 amateur golfers identifies "early extension" and "loss of posture" as two of the most common physical limitations contributing to steep delivery and over-the-top transition — both of which are addressable through mobility work and constraint-led training before any swing cue is applied. See TPI research at mytpi.com
The Drills That Actually Teach Correct Trail Elbow Behavior
This is where I want to be precise. The following drills are organized by the root cause they address — not just the symptom. Every drill I assign comes with an immediate feedback mechanism. If you can't measure the change within 10 swings, the drill is wrong for your pattern.
What If the Problem Is the Transition Sequence?
If your trail elbow is elevating because your upper body is firing first, the Towel Under Trail Armpit drill is your starting point.
How to execute: 1. Place a small towel or headcover under your trail armpit at address. 2. Make a full backswing — the towel should stay in place. 3. Begin the downswing by feeling the lower body move first. The towel stays connected as long as the trail elbow stays close to the body. 4. If the towel drops early, you have initiated with the upper body. 5. Hit 20 balls at 70% speed, monitoring path and attack angle on TrackMan after each set of 5.
This drill is a constraint — the physical feedback of the towel dropping tells the body immediately when the sequence has broken. It works because it removes the need for a verbal thought. You are solving a physical problem.
Pair the Towel Under Trail Armpit with the Pitcher's Throw Feel drill. Stand in your setup and rehearse the feeling of a pitcher loading into the back leg, then initiating the throw with the lead hip driving forward before the arm fires. That lower-body-first sequencing pattern is exactly what needs to happen in the golf swing transition. The trail elbow drops naturally when the lower body leads.
For players who need a more structured approach to the over-the-top pattern, the Pump Drill is one of the most effective tools I have. At the top of the backswing, stop and make three small pumping motions — each one dropping the trail elbow slightly lower and more toward the right hip. Then swing through. This trains the motor pattern of the elbow dropping in transition before full-speed swings are attempted.
What If the Problem Is Wrist Conditions?
If HackMotion data shows excessive trail wrist extension at the top, shallowing the trail elbow alone will not produce the correct club face conditions. You need to address the wrist matchup first.
The Waiter's Tray Drill is the most direct tool for this. Set up as if you are carrying a tray on your trail hand — palm facing up, trail wrist in a flat or slightly flexed position. Make half swings maintaining that tray position into the downswing. This trains trail wrist flexion through the hitting zone, which automatically reduces dynamic loft, improves forward shaft lean, and allows the trail elbow to drop without producing a blocked or flipped face.
I walk through this drill on video here at my YouTube channel .
For a deeper look at how wrist conditions interact with low point and forward shaft lean, read my post on forward shaft lean and how it controls your low point.
What If the Problem Is Casting From the Top?
Casting is a low point problem caused by a pressure problem caused by a sequencing problem. The trail elbow elevating and the club releasing early are symptoms of the same root fault.
The Chest Outrace Arms drill addresses this directly:
- Set up to the ball normally.
- Begin the downswing by consciously feeling the chest rotate toward the target before the arms begin to move.
- The sensation should be that the chest is always slightly ahead of the hands through the hitting zone.
- Hit 15 balls at 80% speed and watch for the attack angle to improve by 1-2 degrees immediately.
The Impact Bag Push drill is the most direct feedback tool for forward shaft lean and compression. Set an impact bag at the ball position. Push into the bag with the club, maintaining forward shaft lean — handle ahead of the club head. Hold the position. Feel the belt buckle past the lead ankle. This static rehearsal of the impact position teaches the body what "correct" feels like before dynamic swings are attempted.
What If the Problem Is Excessive In-to-Out Path After Shallowing?
This is the most common overcorrection I see when golfers successfully shallow the club but haven't matched it with correct body rotation. The path goes too far in-to-out, and the ball starts right and curves further right (for right-handers with an open face) or hooks violently left (with a closed face).
The Hit the Intentional Fade drill is the corrective tool:
- Set up with the club face slightly open to the target.
- Feel the body rotate aggressively through impact — lead hip clearing, chest facing the target at P8.
- Swing with the intention of producing a fade. This forces the path to neutralize and trains the body rotation that prevents the in-to-out overcorrection.
Pair this with the Alignment Stick Gate drill — place two alignment sticks creating a gate slightly outside the ball on the target line. The task is to swing through the gate without hitting either stick. This external constraint immediately corrects an excessively in-to-out path by giving the body a physical problem to solve.
The Correct Sequence for Teaching Shallowing
Here is the exact sequence I follow at The Science of Better Golf when shallowing is the diagnostic priority:
Step 1 — Diagnose the root cause. TrackMan numbers first. Attack angle, path, smash factor, spin loft. HackMotion for wrist conditions. High-speed video for visual confirmation of the trail elbow position at P4 (top of backswing) and P6 (lead arm parallel, downswing).
Step 2 — Address mobility limitations first. If T-spine rotation is restricted, no swing cue will produce lasting change. T-Spine Foam Rolling before every practice session is non-negotiable for players with steep delivery patterns. W-Stretches (Scapular Retraction) address the upper back tightness that prevents the trail shoulder from dropping correctly in transition.
Step 3 — Sequence the lower body. Use the Stomp Drill or Force Pedal Setup to establish lower body initiation before any arm/elbow work is introduced. The stomp drill — literally stomping the lead foot into the ground at the start of the downswing — forces the kinematic sequence to start from the ground up.
Step 4 — Introduce the trail elbow constraint. Now — and only now — use the Towel Under Trail Armpit or Pump Drill to train the trail elbow behavior within the correct sequence.
Step 5 — Add wrist condition matching. Use HackMotion feedback or the Waiter's Tray Drill to ensure the trail wrist position matches the new trail elbow position.
Step 6 — Measure immediately. TrackMan numbers should show improvement in attack angle and path within 10-15 swings. If they don't, the root cause diagnosis was incomplete.
Step 7 — Build to full speed. Use the Whoosh Drill (inverted club, swishing sound should occur in front of the ball, not behind it) to confirm the release pattern has improved at full speed before returning to normal ball-striking.

Golf student hitting balls on the driving range during a Scottsdale golf lesson with Coach Erik Schjolberg at McCormick Ranch
The Matchup Problem: Why Your Trail Elbow Fix Broke Your Ball Flight
The single most important concept in my entire coaching system is the matchup framework. There are no universal fundamentals — only matchups. The trail elbow position must match the wrist conditions, which must match the club face angle, which must match the grip, which must match the release pattern.
Here is the most common matchup failure I see after a golfer successfully shallows the club:
The player drops the trail elbow correctly. The path improves from 4 degrees out-to-in to 3 degrees in-to-out. But the club face was already closed relative to the path before the change, and now — with a more in-to-out path — the face-to-path relationship has gone from a 2-degree hook to an 8-degree hook. The ball goes from a gentle pull-draw to a snap hook.
The fix is not to re-steepen the plane. The fix is to match the club face to the new path. The Toe-Up Swings drill trains club face awareness through the hitting zone. The Motorcycle Move — feeling the trail forearm rotate into a motorcycle throttle-grip position through impact — trains the correct amount of forearm rotation to square the face to the new path without over-closing it.
Citation Hook: Research by Dr. Sasho MacKenzie on the mechanics of the golf swing demonstrates that club face angle at impact accounts for approximately 75-85% of the initial ball direction — making face-to-path matchup the most consequential variable in ball flight control, above swing path, above attack angle, and above swing speed.
For a complete breakdown of how path and face interact to control your start line and curvature, see my detailed post on ball flight laws and what they mean for your practice.
If you want to work through these matchups with real-time TrackMan feedback, my online golf lessons program includes video analysis with HackMotion and Sportsbox AI integration — you don't need to be in Scottsdale to get precise diagnostic work done.
What the Best Players in the World Show Us
Look at the down-the-line view of Rory McIlroy at P6. The trail elbow is close to the right hip, the shaft is below the original shaft plane from address, and the club is approaching from well inside the target line. This is textbook shallowing.
But here is what most instruction misses: Rory's trail elbow is in that position because his lower body has already rotated 45+ degrees toward the target while his upper body is still completing the backswing. The elbow is responding to the sequence. It is not driving it.
The same pattern appears in every elite ball-striker I have analyzed on Sportsbox AI: the pelvis-thorax separation in transition is what creates the space for the trail elbow to drop. Without that separation, the elbow has nowhere to go except up and over.
This is why I never give a trail elbow cue in isolation. I always pair it with a lower body sequencing drill, because the lower body is the engine that makes the elbow behavior possible.
To learn more about my full coaching approach and background, visit the about Coach Erik page.
Frequently Asked Questions
Does shallowing the club actually add distance?
Yes, but not through the mechanism most golfers assume. Shallowing the club reduces spin loft — the difference between attack angle and dynamic loft at impact — which directly increases ball speed and reduces excess backspin. It also improves low point location, which increases centeredness of contact and smash factor. The net result is more distance, but it comes from better compression and lower spin, not from swinging harder. In my testing, golfers who correct a steep delivery pattern often gain 10-20 yards with irons without any increase in club speed.
Should I feel like I'm dropping the trail elbow or pulling it down?
Neither — and this is exactly the problem with most trail elbow cues. The correct sensation is that the lower body moves first and the trail elbow follows. If you are consciously dropping or pulling the elbow, you are likely firing the trail side before the lower body has initiated, which creates a different timing problem. The best cue I give is the Pitcher's Throw Feel — feel the lower body drive forward first, and let the trail elbow respond to that movement. The sensation should be passive, not active.
What is the difference between shallowing and coming too far from the inside?
Shallowing refers to the delivery plane becoming less vertical — the club approaching on a flatter angle. Coming too far from the inside refers to the swing direction (path) being excessively in-to-out at impact. You can shallow the plane correctly and still have a neutral or slightly in-to-out path. The problem occurs when shallowing is overdone without matching body rotation — then the path becomes excessively in-to-out (6+ degrees), producing push-draws or snap hooks. TrackMan's swing direction number is the definitive measure. A healthy in-to-out path for a draw is 2-4 degrees. Anything beyond 6 degrees is a matchup problem.
Can I train shallowing without TrackMan or launch monitor feedback?
You can make progress, but you are working with significantly less information. The two best low-tech feedback tools are: (1) the Towel Under Trail Armpit drill, which gives you immediate physical feedback when the sequence breaks, and (2) the Pump Drill, which trains the motor pattern of the elbow dropping in transition. Ball flight feedback — specifically the start line and curvature of the ball — also tells you a great deal about whether path and face have improved. A ball that starts right of the target and curves further right (for right-handers) confirms an open face with an in-to-out path, which is the correct direction of change from a steep, out-to-in pattern. That said, if you want precise numbers, my Scottsdale golf lessons at McCormick Ranch Golf Club use TrackMan 4 for every session.
Why does my trail elbow keep flying away from my body in the backswing?
A trail elbow that separates from the body in the backswing — sometimes called a "flying elbow" — is almost always caused by one of three things: (1) restricted trail shoulder internal rotation, which forces the elbow to elevate to complete the backswing; (2) an overly strong grip that closes the club face, requiring the trail arm to elevate to keep the face manageable; or (3) a backswing that is too long for the player's mobility, causing the elbow to lose structure at the top. The W-Stretches (Scapular Retraction) drill addresses the mobility component. The Smart Ball Connection drill — placing a training aid between the forearms and making half swings — addresses the structural connection component. Fix the cause before addressing the elbow position.
How do I know if my trail elbow position is actually causing my steep angle of attack?
Pull your TrackMan numbers. If attack angle is steeper than -4 degrees with mid-irons AND your swing direction is more than 3 degrees out-to-in AND your smash factor is below 1.38, the delivery plane is the problem. Then watch your P4-to-P6 transition in high-speed video from down the line. If the club head is above the original shaft plane at P6 (the shaft is steeper than the address shaft angle), the delivery is steep and the trail elbow is likely contributing. If the club is below the shaft plane at P6, the delivery is already shallow and the problem is elsewhere — path, face, low point, or pressure shift.
Is the trail elbow cue better for irons or driver?
The trail elbow behavior is relevant for both, but the desired outcome differs. With irons, you want a slightly descending attack angle (negative), so shallowing the delivery plane while maintaining a small negative attack angle is the goal. With driver, you want a positive attack angle (hitting up on the ball), which requires an even shallower delivery plane — the trail elbow drops further and earlier in transition, and the lower body drives more aggressively to create the upward attack angle. The Pump Drill works for both. For driver-specific shallowing work, the Shaft on Lead Shoulder drill — placing a shaft across the lead shoulder at address and feeling it point at the ball on the downswing — is one of the most effective plane-training tools I use. It makes the correct delivery angle a physical target rather than an abstract concept.
The Bottom Line on Trail Elbow and Shallowing
The trail elbow is a real and important component of a shallow delivery — but it is a dependent variable, not an independent one. It drops correctly when the kinematic sequence is correct. It drops incorrectly, or fails to drop at all, when the sequence is broken.
The data from TrackMan, the biomechanics research from Dr. MacKenzie, Dr. Kwon, and the TPI database, and my own work with thousands of students at McCormick Ranch Golf Club all point to the same conclusion: fix the sequence first, address the wrist matchup second, and the trail elbow will find its correct position as a natural consequence.
The drills that produce real, measurable change — the Towel Under Trail Armpit, the Pump Drill, the Waiter's Tray, the Chest Outrace Arms — all work because they train the correct sequence and matchup, not because they isolate the elbow. That is the difference between a drill that produces improvement on day one and a cue that produces confusion for weeks.
If you want the complete system — organized by fault, cause, and drill — download the free drills guide at EJSGolf.com. Every drill in this post is in there with step-by-step instructions and the TrackMan numbers to look for as confirmation.
Start Improving Today
If you are serious about fixing your delivery plane and building a ball-striking pattern that holds up under pressure, I want to work with you. Whether you are local to Scottsdale or anywhere in the world, I have options designed to produce measurable improvement from the first session.
Download the free drills guide at EJSGolf.com/my-drills — it includes every drill referenced in this post, organized by fault category, with setup instructions and feedback cues.
For the complete ball-striking system, the Ball Striking Machine Blueprint Video Series at thescienceofbettergolf.com/ball-striking-blueprint walks you through the full impact hierarchy — low point, compression, spin loft, and centeredness of contact — with the same TrackMan-verified framework I use in every lesson.
Book a lesson — in-person at McCormick Ranch Golf Club in Scottsdale through my Scottsdale golf lessons page, or remotely through my online golf lessons program using video analysis, HackMotion wrist sensor data, and Sportsbox AI.
The ball doesn't know what you felt. It only knows what happened at impact. Let's make impact better — starting today.
Coach Erik Schjolberg | PGA Professional | Owner, Coach Erik Schjolberg Golf | Founder, The Science of Better Golf | McCormick Ranch Golf Club, Scottsdale, Arizona
EJS Golf | Scottsdale Golf Lessons | Online Golf Lessons | Free Drills Guide | The Science of Better Golf Blog

What You Can Expect from Our Blog
1. Expert Insights on Swing Mechanics:
With over 25 years of experience as a PGA Professional Golf Instructor, I delve deep into the nuances of golf swing mechanics. My articles break down complex theories into understandable concepts, focusing on ground reaction forces (GRFs), biomechanics, and efficient energy transfer.
2. Advanced Technological Guidance:
Our academy is equipped with state-of-the-art tools like the Trackman 4 Launch Monitor, 3D Pressure Plates, and Hackmotion, among others. On the blog, I share how to leverage these technologies to gain precise feedback on your swing, helping you make informed adjustments and see measurable improvements.
3. Tailored Practice Routines:
My philosophy is built on the belief that improvement should be evident from the first lesson. I advocate a '15 minutes per day' practice model, designed to fit into your busy schedule while ensuring consistent progress. Each blog post aims to offer practice drills and routines that are easy to implement and effective in refining your skills.
4. Real Success Stories:
Read about the experiences of those who have trained at EJS Golf Academy. These testimonials not only inspire but also illustrate the practical application of our teaching methodologies and the real results achieved.
5. Interactive Learning:
We occasionally feature video tutorials and interactive content that allows you to visually grasp techniques and corrections. This blended approach helps reinforce learning and allows you to engage with the content actively.
How Our Blog Helps Golfers Get Better
Every post is crafted with the intent to educate. We cover everything from basic fundamentals to advanced techniques, ensuring there's something valuable for every skill level. By presenting data and evidence-backed strategies, our blog demystifies the 'why' and 'how' behind effective golf training. This analytical approach empowers you to make smarter decisions about your practice and play. We understand that generic advice does not suit everyone. Our blog posts are designed to help you identify your own needs and adapt our techniques accordingly. Whether it’s adjusting your grip, stance, or swing path, you’ll find personalized tips that resonate with your specific challenges. Beyond just reading, our blog serves as a community hub where you can interact with fellow golfers and share your experiences. This supportive environment encourages learning and improvement through collective wisdom.
Join Us on Your Path to Mastery
Whether you’re looking to refine your swing, understand the biomechanics of your body, or simply get more enjoyment out of the game, our blog at EJS Golf Academy is your go-to resource. Bookmark our page, subscribe to updates, and start transforming your game today.
Remember, at EJS Golf, we don’t just teach golf; we craft master golfers. Let’s begin this journey together. Visit us atEJSGolf.com to learn more about our programs and start your training online or at our Scottsdale location. Let’s make every swing count!
DO YOU HAVE QUESTIONS?
Fill out my contact form and I will respond to you within 24 hours.


phone: 480.861.9370 email: [email protected]

I've taken multiple private lessons with Erik and he's been by far the best swing coach I have ever worked with. He has the ability to dissect your swing and make small changes for big improvements. What I love most about his lessons is they go far beyond the 1 or 2 hours you're with him. He follows up with videos of how you can improve at home and on the range. The value he provides is absolutely worth the cost of his sessions. I would recommend any golfer at any level who truly wants to get better to go see Erik.”
- Reanol H.
Erik is the best! and that is not an exaggeration. There has not been a single lesson where I haven't walked out and felt like a far better golfer than before. What can't be praised enough is the effort and dedication that Eric puts into each of his students, as his approach to fixing and improving my golf swing was specific to me. While teaching, Erik takes the extra time to truly dive into what he is trying to convey rather than just telling you, allowing for a better understanding. Beyond the instruction at the course, Erik sends specific drills to you from an app that allows for slow motion replays, letting you break down everything and work on your game at any time. I genuinely mean it when I say that I would recommend Erik to anyone wanting to improve their golf game, as he is not only a top not instructor but also a top notch person who cares about his students.
- Brennan K.
Erik is flat out a great coach and mentor! I highly recommend him! Working from the ground up, my swing is healthier and smooth! I wanted a coach that shared the same main principles as the late Tony Manzoni and Erik hits the mark! Found Erik by listening to the Golf Smarter podcast by Fred Greene and connected with EJS Golf through the Perfect Motion app. Erik is motivated and incredibly gifted at his craft!
- Bryan B., Indiana, USA