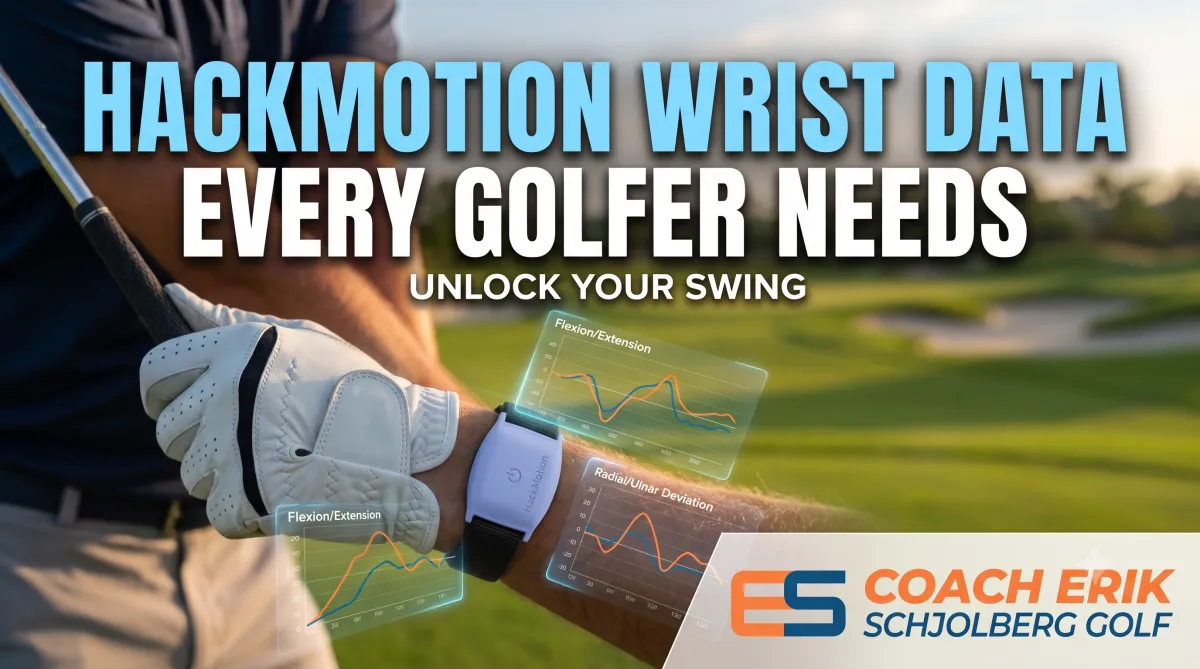
HackMotion Wrist Data Every Golfer Needs | Coach Erik
What Does HackMotion Actually Reveal About Wrist Flexion and Extension — and Why Should Every Golfer Care?
Last Updated: July 10, 2026
By Coach Erik Schjolberg, PGA Professional | The Science of Better Golf | McCormick Ranch Golf Club, Scottsdale, Arizona
Most golfers have never seen their wrist data. They've heard words like "cupped" and "bowed" thrown around on television, they've watched slow-motion footage of tour players, and they've tried to copy what they see. But copying a position without understanding the cause-and-effect chain behind it is how you spend three seasons spinning your wheels.
HackMotion changes that. It is a wrist sensor system that captures lead and trail wrist flexion, extension, radial deviation, and ulnar deviation in real time — through every position from P1 to P10. When I attach HackMotion sensors to a student at McCormick Ranch Golf Club and pair that data with TrackMan 4 launch monitor numbers, the diagnosis becomes surgical. We stop guessing. We see exactly what the wrists are doing, when they are doing it, and what it costs at impact.
This post is the complete breakdown. You will understand what wrist flexion and extension actually mean in a golf swing, what the HackMotion data reveals about the most common patterns I see, how those wrist conditions connect directly to ball flight, and which drills from my library will fix the problem at the root.
Key Takeaways
Lead wrist flexion at the top of the backswing closes the club face; lead wrist extension opens it — and the HackMotion sensor quantifies exactly how much.
Wrist conditions are not independent variables. They must match grip, club face angle, swing plane, and release pattern. Changing one without auditing the others creates a new problem.
The single most common pattern I measure with HackMotion is excessive lead wrist extension through impact — the root cause of the flip, the fat strike, and the open club face miss.
Forward shaft lean is not a hand position. It is the consequence of correct wrist conditions (lead wrist flexion maintained into impact) combined with correct sequencing and pressure shift.
HackMotion biofeedback accelerates motor learning faster than verbal instruction alone — the sensor provides real-time audio feedback that closes the gap between what you feel and what is actually happening.
You cannot fix a wrist extension problem by trying harder to flex the wrist. You fix it by removing the sequencing cause — the early pressure shift, the hanging back, the over-the-top transition — that forces the extension in the first place.
Every drill in this post is chosen because it addresses the root cause, not the symptom.
What Do Wrist Flexion and Extension Actually Mean in a Golf Swing?
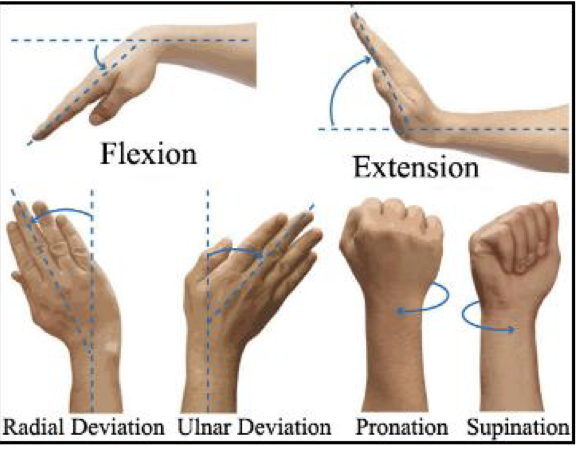
Wrist flexion means the back of the lead hand moves toward the forearm — the wrist "bows." Wrist extension means the back of the lead hand moves away from the forearm — the wrist "cups." These are the two most impactful wrist conditions in the golf swing, and HackMotion measures them in degrees at every position from address through finish.
Here is why this matters more than almost any other data point: the lead wrist angle at impact directly controls dynamic loft, spin loft, and club face angle — three of the five TrackMan imperatives that determine what the ball does.
When the lead wrist is in flexion at impact, the club face delofts, the shaft leans forward, and the arc bottoms out in front of the ball. That is compression. That is the ball flight every serious golfer is chasing.
When the lead wrist moves into extension through impact — even subtly, even two or three degrees — the club face opens, dynamic loft increases, spin loft increases, and the arc bottom moves back toward or behind the ball. That is the flip. That is the thin shot, the fat shot, the balloon ball flight, and the block-hook combination that makes no logical sense until you see the sensor data.
How Does HackMotion Measure These Conditions?
HackMotion uses a gyroscope and accelerometer embedded in a wrist-worn sensor that attaches to the lead hand (and optionally the trail hand). The system captures:
Flexion/Extension — the primary plane governing club face angle and dynamic loft
Radial/Ulnar Deviation — governing wrist hinge and club head lag
3D wrist angle — the combined position that determines true wrist loading
The data streams live to an iPad or phone. The system can be set to provide an audio tone when the lead wrist crosses a threshold — say, more than 10 degrees of extension at the top — which creates real-time biofeedback that the nervous system responds to far faster than a coach saying "keep it flat."
In my testing at The Science of Better Golf, students who use HackMotion biofeedback in a 60-minute session make measurable changes to their wrist conditions that would take weeks of mirror work and verbal coaching to achieve. The body learns faster when it has immediate, accurate feedback.
Citation Hook: HackMotion research published on their platform shows that 80% of amateur golfers have more than 15 degrees of lead wrist extension at the top of the backswing, compared to tour averages that typically range from 5 degrees of extension to 10 degrees of flexion depending on grip and desired ball flight.
Why Do Wrist Conditions Matter More Than Most Coaches Admit?
The wrists are the last link in the kinematic chain before the club head. Every decision made by the lower body, pelvis, torso, and lead arm arrives at the club face through the wrists. If the wrists are in the wrong condition at the wrong time, they corrupt every good thing that happened earlier in the sequence.
I have seen students with excellent lower body sequencing, good pressure shift, and solid plane who still flip through impact because their lead wrist moves into extension in the last 18 inches before the ball. TrackMan shows a dynamic loft of 22 degrees on a 7-iron — when it should be 16. The ball launches high, balloons, loses distance, and the student is told to "hit down more." That instruction does nothing because the cause is wrist extension, not swing direction.
Here is the hierarchy as it applies to wrist conditions:
Wrist ConditionClub Face EffectDynamic Loft EffectLow Point EffectTypical Ball FlightLead wrist flexion at impactCloses faceReduces loftMoves forward (correct)Penetrating, compressed, draw biasLead wrist neutral at impactNeutral faceCorrect loftCorrectSolid, consistentLead wrist extension at impactOpens faceAdds loftMoves back (behind ball)High, weak, thin/fat, open faceExcessive lead wrist flexionOver-closes faceSeverely reduces loftCan over-compressLow hook, low ball flight
The matchup framework applies here completely. A golfer with a strong grip (lead hand rotated clockwise) who also has significant lead wrist flexion at impact will produce a severely closed club face and a low hook. That is not a wrist problem — that is a matchup problem. I never change one variable without auditing the system.

Golf student practicing a constraint-led ball striking drill with Coach Erik Schjolberg observing at McCormick Ranch Golf Club Scottsdale
Citation Hook: Research by Dr. Sasho MacKenzie at St. Francis Xavier University has demonstrated that wrist conditions in the final 20 milliseconds before impact are the primary determinant of dynamic loft and club face angle — more influential than swing plane or hand path at that stage of the motion.
What Does the HackMotion Data Actually Show in Amateur Golfers?
After analyzing thousands of swings using HackMotion alongside TrackMan at EJS Golf, I can tell you that there are three dominant wrist patterns I see in amateur golfers, and each one produces a predictable set of TrackMan numbers.
Pattern 1: Excessive Extension at the Top, Maintained Through Impact
This is the most common pattern. The lead wrist moves into 20-30 degrees of extension at the top of the backswing (creating a cupped wrist and an open club face), and the golfer never recovers from it. Through impact, the wrist stays in extension — or moves further into extension — producing a flip or an early release.
TrackMan signature: Dynamic loft 5-8 degrees above club spec. Spin rate 500-800 RPM above optimal. Attack angle shallow to neutral. Smash factor below 1.40 on irons. Ball flight high and weak or thin.
What HackMotion shows: 25+ degrees extension at P4 (top of backswing), minimal change through transition, 15+ degrees extension at P7 (impact).
Pattern 2: Extension at the Top, Overcorrected Flip Through Impact
This golfer has been told about the flip. They try to hold the lag. What actually happens is they hold the extension at the top and then violently extend further through impact in an attempt to square the face. The result is a massive flip — the club head passes the hands before impact.
TrackMan signature: Dynamic loft extremely high (25+ degrees on a 7-iron). Severe early release. Attack angle often goes positive (hitting up on an iron). Heel strikes. Smash factor below 1.35.
What HackMotion shows: 20+ degrees extension at P4, movement toward further extension from P6 to P7, then rapid flexion through P8-P9 (after impact — too late).
Pattern 3: Flexion at the Top, Correct Delivery — The Tour Pattern
The lead wrist is in 5-15 degrees of flexion at the top. Through transition and into impact, the flexion is maintained or slightly increased. The club face is controlled. Dynamic loft matches spec. Forward shaft lean is present.
TrackMan signature: Dynamic loft at or below club spec. Spin rate optimal. Attack angle appropriate for club. Smash factor 1.45+ on irons. Penetrating ball flight with appropriate curvature.
What HackMotion shows: 5-15 degrees flexion at P4, maintained through P6, slight increase to 10-20 degrees flexion at P7.
Citation Hook: TrackMan University data consistently shows that PGA Tour players average approximately 4 degrees of forward shaft lean at impact with a 7-iron, producing a dynamic loft of roughly 16 degrees against a static loft of 31 degrees — a delofting effect directly attributable to maintained lead wrist flexion through impact.
What Causes Excessive Lead Wrist Extension — and How Do You Fix It?
This is the critical question. Extension at the top is not a wrist problem. It is almost always caused by one or more of the following upstream faults:
A weak grip — the lead hand positioned too far counterclockwise at address, which requires the wrist to cup in order to square the face at the top
A steep backswing plane — the club moving too vertically forces the wrist to cup to keep the club face from pointing at the sky
Early casting from the top — the trail arm firing before the lower body initiates, which forces the lead wrist into extension to compensate
Hanging back through impact — the upper body center staying behind the ball forces the wrist to extend to find the ball
You do not fix the wrist. You fix the cause. The wrist data tells you what is happening. The coaching tells you why.
Drill 1: The Waiter's Tray Drill for Wrist Conditions
The Waiter's Tray Drill is the most direct drill I use for teaching lead wrist flexion maintenance through impact. The concept: imagine you are carrying a waiter's tray in your trail hand from P6 to P8. The tray stays level — it does not tip forward (which would represent extension/flip) or tip backward.
How to execute:
Take your normal address position with a mid-iron.
Make a half-swing to P6 (lead arm parallel to ground, club shaft parallel to target line).
From P6, feel the trail forearm rotating under — not the hands flipping over. The tray stays flat.
Strike the ball and hold the impact position for two seconds. Check: is your lead wrist flat or bowed? Is the shaft leaning forward?
Add HackMotion biofeedback — set the audio threshold to alert you when extension exceeds 5 degrees through the impact zone.
The Waiter's Tray Drill directly addresses casting from the top and flipping through impact. It teaches the correct wrist condition through a physical task rather than a verbal instruction.
Drill 2: The Motorcycle Move for Club Face Control
The Motorcycle Move is a pre-swing and transition feel drill. From the top of the backswing, the sensation is that the trail hand "revs the motorcycle" — rotating the grip as if accelerating a throttle. This promotes lead wrist flexion and closes the club face without the hands flipping.
I use this drill specifically with Pattern 1 golfers — those who carry extension through impact and produce an open club face. The Motorcycle Move creates the correct wrist condition as a feel, which HackMotion then validates with data. You can watch my breakdown of this drill here .
Drill 3: The Pump Drill for Transition Sequencing
If the extension at the top is caused by casting — the trail arm firing early — the fix is sequencing, not wrist position. The Pump Drill addresses this directly.
How to execute:
Take your normal backswing to P4 (top).
Instead of swinging through, pump the club back down to P6 and back up to P4 three times without hitting the ball.
On the third pump down, continue through to impact.
The pumping motion forces the lower body to initiate first — the pelvis must move to allow the arms to drop — which prevents the casting that causes the extension.
The Pump Drill addresses over-the-top transition and casting from the top. When the sequencing is correct, the lead wrist naturally maintains a more neutral or flexed position because it is not being used to compensate for a late lower body.

Manicured golf fairway lined with tall cypress and pine trees at golden hour — the kind of precision environment Coach Erik Schjolberg teaches in
How Do Wrist Conditions Connect to the Five TrackMan Imperatives?
This is where the data becomes actionable. Every wrist condition change I make with HackMotion must show up on TrackMan within the same session. If it does not, the diagnosis is incomplete.
Low Point
Lead wrist flexion through impact moves the arc bottom forward. Extension moves it back. This is the single most important connection in the entire post. The sternum and upper-body center govern the arc, but the wrist condition determines whether the arc delivers the club head on the correct side of the ball. A student can have perfect weight shift and still hit it fat if the lead wrist extends at P6-P7.
The Force Pedal Setup drill addresses the pressure shift that allows the wrist to maintain flexion. When the lead foot pressure increases correctly from P5 through P7, the lower body creates the conditions for the wrist to stay loaded. Without that pressure shift, the wrist has to extend to find the ball.
Swing Direction and Plane
The lead wrist extension at the top is often paired with a steep, out-to-in swing direction. When the club face opens due to extension, the golfer instinctively swings left (for a right-hander) to compensate — producing the over-the-top path. This is why fixing wrist conditions without fixing path creates a new problem. I always check both on TrackMan simultaneously.
The Airplane Arms drill addresses the over-the-top transition that often accompanies excessive extension. By feeling the trail arm staying connected to the torso through the downswing, the path shallows and the wrist condition improves as a consequence.
Centeredness of Strike
Extension at impact moves the arc back, which produces heel strikes and thin contact. In my testing, golfers who reduce lead wrist extension by 8-10 degrees at impact see smash factor increase by 0.04-0.07 in the same session. That is measurable, immediate improvement — exactly what the improvement philosophy demands.
The Pivot Driven Release drill is the most effective drill I use for connecting body rotation to wrist conditions through impact. When the chest "outraces" the arms correctly, the lead wrist is pulled through in flexion by the rotation — not by a conscious wrist manipulation.
Club Speed
This is the counterintuitive one. Golfers who flip through impact often do so because they are trying to add speed with the hands. The flip feels powerful. HackMotion data shows it is not — the early release dissipates the energy that should arrive at the ball. The Whoosh Drill teaches the correct release timing: the loudest whoosh should occur at P7-P8, not P5-P6. When the whoosh moves forward, speed increases and wrist conditions improve simultaneously.
Citation Hook: Dr. Scott Lynn's biomechanics research on wrist mechanics in the golf swing has demonstrated that premature wrist uncocking (casting) can reduce club head speed at impact by 8-12% compared to a properly sequenced release — a significant speed loss that cannot be recovered by trying to swing harder.
What Is the Correct Lead Wrist Condition at Each Key Position?
This is the reference framework I use when interpreting HackMotion data. These are ranges, not fixed numbers — the matchup framework means that the correct number for any individual depends on their grip, their intended ball flight, and their swing architecture.
PositionTour Average Flexion/ExtensionAmateur AverageWhat Deviation CostsP1 (Address)0-5° extension0-8° extensionSets baseline — excessive extension here often carried throughP4 (Top)5-15° flexion15-30° extensionOpen club face, steep plane, casting setupP6 (Mid-downswing)10-20° flexion5-15° extensionFlip already beginning, dynamic loft increasingP7 (Impact)10-25° flexion5-20° extensionDirect cost: high dynamic loft, open face, arc backP8 (Post-impact)Releasing toward neutralRapid extensionToo late — damage done at P7
For golfers who want to understand how wrist conditions connect to low point and forward shaft lean, I recommend reading my post on forward shaft lean and how it connects to low point control — it covers the biomechanical chain from sequencing to impact in detail.
How Do You Use HackMotion to Build a Practice Routine?
The sensor is only as valuable as the protocol around it. Here is the exact framework I use with students who come to me for Scottsdale golf lessons at McCormick Ranch.
Step 1: Baseline Assessment (10 minutes)
Hit 10 shots with a 7-iron at normal pace. HackMotion records all positions.
Review P4 (top) and P7 (impact) wrist angles.
Cross-reference with TrackMan: dynamic loft, smash factor, attack angle.
Identify the primary pattern (extension at top, maintained extension at impact, or overcorrected flip).
Step 2: Identify the Upstream Cause (5 minutes)
Ask three questions: - Is the grip neutral, strong, or weak? (A weak grip almost guarantees extension at the top.) - Is the backswing plane steep or shallow? (Steep plane drives extension.) - Is the pressure shift correct? (Hanging back forces extension through impact.)
Step 3: Apply the Correct Drill (20 minutes)
Extension at top caused by grip: adjust grip first, then use Toe-Up Swings to confirm club face control through the new wrist condition.
Extension at top caused by steep plane: use Towel Under Trail Armpit to shallow the plane, reducing the need for compensatory extension.
Extension through impact caused by hanging back: use Force Pedal Setup to establish correct pressure shift, then Impact Bag Push to feel forward shaft lean.
Extension through impact caused by casting: use Waiter's Tray Drill and Pump Drill in combination.
Step 4: Measure the Change (10 minutes)
Hit 10 more shots. Compare HackMotion P7 data to baseline. Compare TrackMan dynamic loft and smash factor. If the wrist condition improved but the TrackMan numbers did not, the diagnosis needs revision. There is another variable in play.
Step 5: Transfer to Full Swing (15 minutes)
Use the L-to-L Drill — half swings from P6 to P9 — to ingrain the new wrist condition at reduced speed before returning to full swings. The L-to-L Drill specifically addresses the release pattern and wrist conditions through impact at a tempo that allows the nervous system to process the new feedback.
For golfers working remotely, I offer online golf lessons where students use HackMotion paired with their own TrackMan or Garmin Approach data and submit video through Sportsbox AI. The diagnosis process is identical — the tools travel.

Golf student executing a ball striking drill under Coach Erik Schjolberg's supervision on the McCormick Ranch driving range in Scottsdale
What About the Trail Wrist — Is Extension Actually Correct There?
Yes — and this is one of the most misunderstood points in wrist coaching. The trail wrist should be in extension through impact. This is not a fault. Trail wrist extension through impact is the natural consequence of the trail arm staying below the lead arm, the shaft leaning forward, and the club face being controlled by lead wrist flexion.
The matchup: lead wrist flexion + trail wrist extension at impact = correct compression.
When coaches tell golfers to "bow the wrist" without specifying which wrist, they create confusion. If a golfer bows the trail wrist (moves it into flexion through impact), the club face closes dramatically and the path goes severely in-to-out. That is a different problem entirely.
HackMotion can measure both wrists simultaneously with a two-sensor setup. In my sessions, I run both sensors when the diagnosis is unclear — because the relationship between the two wrists tells a more complete story than either one alone.
The Split Grip Push-Pull drill is the most effective tool I use for teaching the correct lead/trail wrist relationship through impact. By separating the hands six inches on the grip, the golfer can feel the lead hand pressing forward (flexion) while the trail hand pushes under (extension). The relationship becomes tactile and immediate.
For more on how the release pattern connects to path and face control, I recommend reading my breakdown of the pivot-driven release and what it means for club face control — particularly for golfers who struggle with the block-flip combination.
The TPI (Titleist Performance Institute) has published extensive research on wrist mobility and its relationship to swing faults — their wrist assessment protocols are a valuable reference for coaches who want to understand the physical screening that precedes wrist coaching.
For those who want to go deeper into the biomechanics literature, the Journal of Sports Sciences has published peer-reviewed research on upper limb kinematics in the golf swing that supports the data patterns I describe here.
What Are the Most Common Mistakes Golfers Make When Trying to Fix Their Wrist Conditions?
The biggest mistake is treating the wrist as the problem rather than the symptom. I see this constantly — golfers who have watched a video about bowing the lead wrist, who then spend six months trying to manually flex their wrist at the top, and who end up with a new set of compensations that are just as destructive as the original fault.
Here is the mistake list, in order of frequency:
Manually bowing the wrist without changing the grip — produces a severely closed club face that requires a new compensation (usually an over-the-top path to prevent a hook).
Fixing the top of the backswing without fixing the downswing sequence — the wrist can be in perfect flexion at P4 and still move into extension by P7 if the lower body does not initiate correctly.
Using HackMotion biofeedback at full speed immediately — the nervous system cannot process real-time feedback at 100 mph. Start with half-swings, then three-quarter, then full.
Ignoring the grip matchup — a neutral or strong grip is required for lead wrist flexion to produce a square club face. A weak grip with a bowed wrist produces a shut face.
Trying to maintain the bowed position through the entire follow-through — the wrist should release naturally after impact. Holding the bow through P9 produces a block.
The correct approach is always: audit the grip → audit the sequencing → apply the drill that addresses the root cause → measure the result on TrackMan → confirm with HackMotion.
You can explore the full drill library on the free drills guide at EJSGolf.com, where every drill is categorized by fault, concept, and application.
To learn more about my coaching background and methodology, visit about Coach Erik — including how The Science of Better Golf framework was built from the ground up around impact data.
Frequently Asked Questions
What is the difference between lead wrist flexion and a "bowed" wrist in golf?
They are the same thing — flexion is the technical term, "bowed" is the common description. Lead wrist flexion means the back of the lead hand moves toward the lead forearm, creating a convex appearance on the back of the wrist. This condition closes the club face relative to the swing plane, reduces dynamic loft, and moves the low point forward — all of which contribute to compression and solid ball striking. The term "bowed" became popularized by Dustin Johnson's extreme flexion, but any degree of flexion beyond neutral produces these effects to some degree.
Can I use HackMotion without a coach, or do I need supervision?
You can use HackMotion independently, but the data is significantly more actionable with a coach who understands the matchup framework. The sensor gives you accurate wrist angle data at every position — but it does not tell you why the wrist is in that position or what to do about it. Without understanding whether the extension is caused by grip, plane, or sequencing, you risk applying the wrong fix. If you are working independently, I recommend pairing HackMotion with video analysis through Sportsbox AI and cross-referencing with TrackMan launch data to build a complete picture.
How much lead wrist flexion is too much at impact?
The answer depends entirely on your grip. A golfer with a strong grip (two or three knuckles visible on the lead hand) who also has 25 degrees of lead wrist flexion at impact will produce a severely closed club face and a low hook. A golfer with a neutral grip can typically tolerate 15-25 degrees of flexion at impact and produce a controlled draw. The matchup is everything — there is no universal number. In my sessions, I set HackMotion thresholds based on the individual's grip and intended ball flight, not a generic tour average.
Why does my wrist go into extension at the top even when I try to keep it flat?
This is almost always a grip issue, a plane issue, or both. A weak grip requires the wrist to cup at the top to prevent the club face from pointing at the sky — the extension is a compensation, not a choice. A steep backswing plane creates the same problem: the club face opens as it goes vertical, and the wrist cups to manage it. The fix is not to try harder to keep the wrist flat — it is to adjust the grip to neutral or strong, and to shallow the backswing plane using drills like the Towel Under Trail Armpit. Once the cause is removed, the extension at the top typically resolves without any direct wrist instruction.
Does wrist flexion at the top automatically mean I will have forward shaft lean at impact?
No — and this is a critical distinction. Wrist flexion at the top is a necessary but not sufficient condition for forward shaft lean at impact. You also need correct sequencing (lower body initiating the downswing), correct pressure shift (lead foot loading through impact), and the correct low point position (upper body center in front of the ball). A golfer can have excellent wrist flexion at P4 and still lose it entirely by P7 if the lower body does not sequence correctly. The Force Pedal Setup drill and the Impact Bag Push are the two drills I use to confirm that the flexion at the top is being delivered to impact.
How long does it take to change wrist conditions using HackMotion?
In my testing, golfers who use HackMotion biofeedback with the correct drill selection make measurable changes to their P7 wrist angle within a single 60-minute session. The biofeedback audio creates rapid motor learning that verbal instruction cannot replicate at the same speed. However, that in-session change is not the same as a permanent motor pattern. Ingraining the new condition typically requires 4-6 weeks of deliberate practice with the sensor — using the L-to-L Drill and half-swing work before returning to full speed. The pattern is established faster when the root cause (grip, plane, sequencing) has been corrected first.
Is the Motorcycle Move appropriate for all golfers, or only specific patterns?
The Motorcycle Move is most appropriate for Pattern 1 golfers — those who carry lead wrist extension through impact and produce an open club face. It creates the sensation of lead wrist flexion through transition and into impact. It is not appropriate for golfers who already have excessive flexion (a shut club face pattern) — for them, it would make the problem worse. Before applying the Motorcycle Move, I always confirm on HackMotion that the golfer is genuinely in extension at P7, and I confirm on TrackMan that the club face is open relative to path. If both conditions are present, the Motorcycle Move is a high-value drill. If either condition is absent, I look for a different cause.
Ready to See Your Own Wrist Data?
The HackMotion numbers I have described in this post are not abstract — they are the exact patterns I measure every week at McCormick Ranch Golf Club in Scottsdale. When you see your own P4 and P7 wrist angles on the sensor, paired with your TrackMan dynamic loft and smash factor, the diagnosis stops being a conversation and becomes a fact.
If you are serious about building a ball-striking motion that holds up under pressure, the work starts with accurate data.
Here is what I want you to do next:
Download the free drills guide at EJSGolf.com — every drill referenced in this post is in there, with full setup instructions and video demonstrations.
If you are ready to go deeper, the Ball Striking Machine Blueprint Video Series at thescienceofbettergolf.com/ball-striking-blueprint is the most complete system I have built for self-directed golfers — covering low point, wrist conditions, sequencing, and TrackMan interpretation in a structured curriculum.
If you want to work directly with me — in person at McCormick Ranch or remotely through video and sensor data — book your session through the Scottsdale golf lessons page or the online golf lessons page.
Browse The Science of Better Golf blog for more posts like this one — every article is built on the same framework: accurate diagnosis, root cause, measurable fix.
The ball does not lie. Neither does the data.
— Coach Erik Schjolberg PGA Professional | The Science of Better Golf | McCormick Ranch Golf Club, Scottsdale, Arizona EJS Golf


